1. Introduction to MQTTBox
MQTTBox is a desktop client available for Linux, Mac and Windows, very similar to MQTT-Spy.
Once connected to your MQTT HUB, it allows you to define different independant subscribers and publishers in a single interface so you can test your broker, simulate MQTT interactions, etc.
2. Installing MQTTBox
Please, refer to vendors installation manual to have your MQTTBox installed in your system by following indications here:
http://workswithweb.com/html/mqttbox/installing_apps.html
3. Configuring MQTTBox to connect to MyQTThub.com
-
First, create an account in your MyQttHub.com following instructions next. In you already have an account, skip this step:
How to create and manage your MQTT devices with MyQttHub.com
-
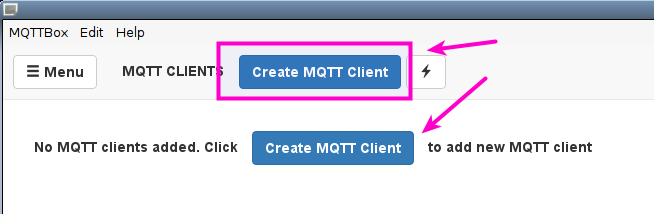
Then, open your MQTTBox client and click to create MQTT client configuration:
-
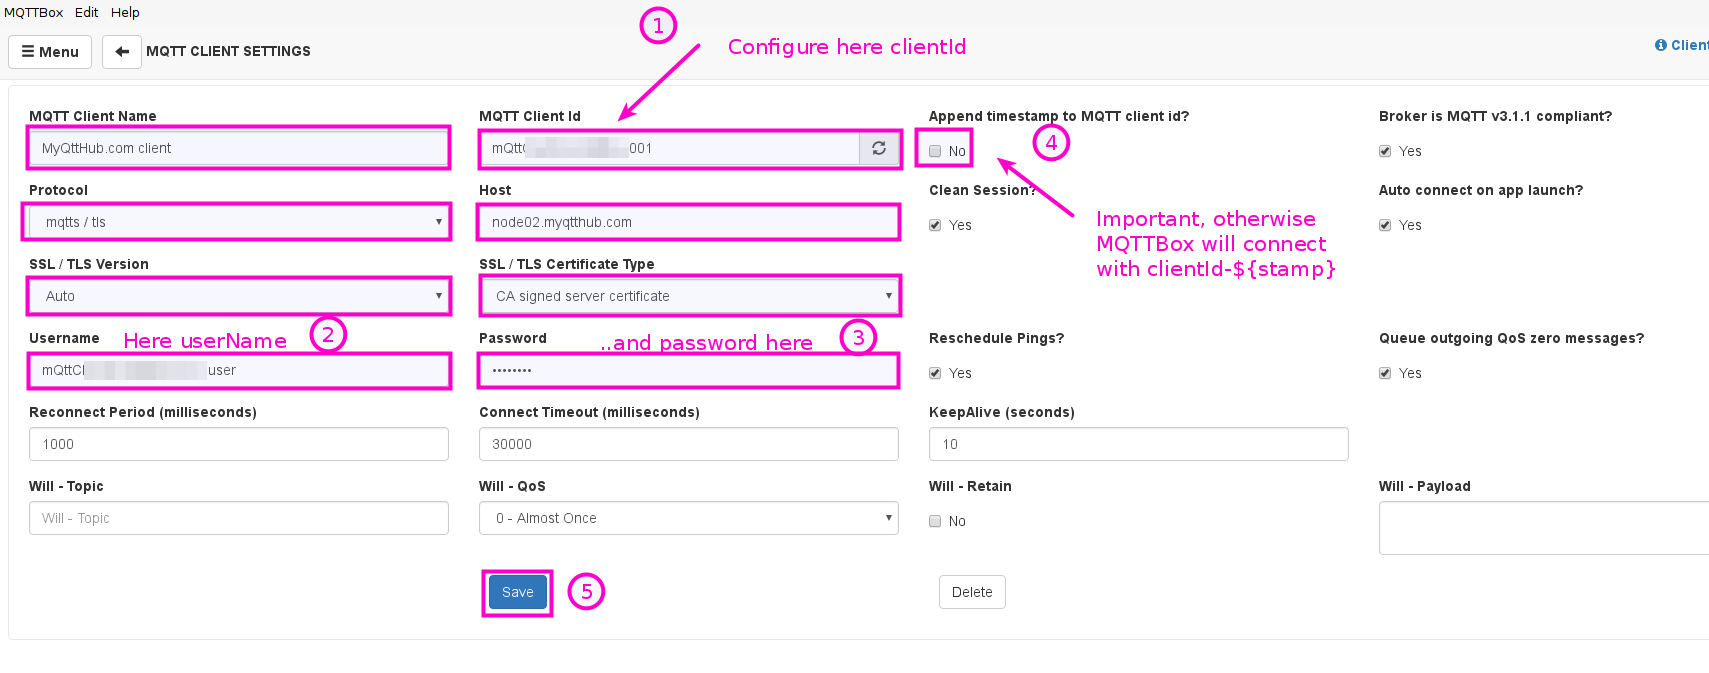
That will open a configuration windows where you have to configure clientId, userName and password you have just created, along with the following settings:
-
MQTT Client name: simple description of your own
-
MQTT Client Id: configure here clientId for the device that will be used to connect (i.e. the one that you have just configured).
-
Append timestamp to MQTT client id: Uncheck (very important: otherwise it will connect but changing your clientId to clientId+"-stamp".
-
Protocol: mqtts / tls
-
Host: node02.myqtthub.com
-
SSL / TLS Version: Auto
-
SSL / TLS Certificate type: CA Signed server certificate
-
…The click save:
-
-
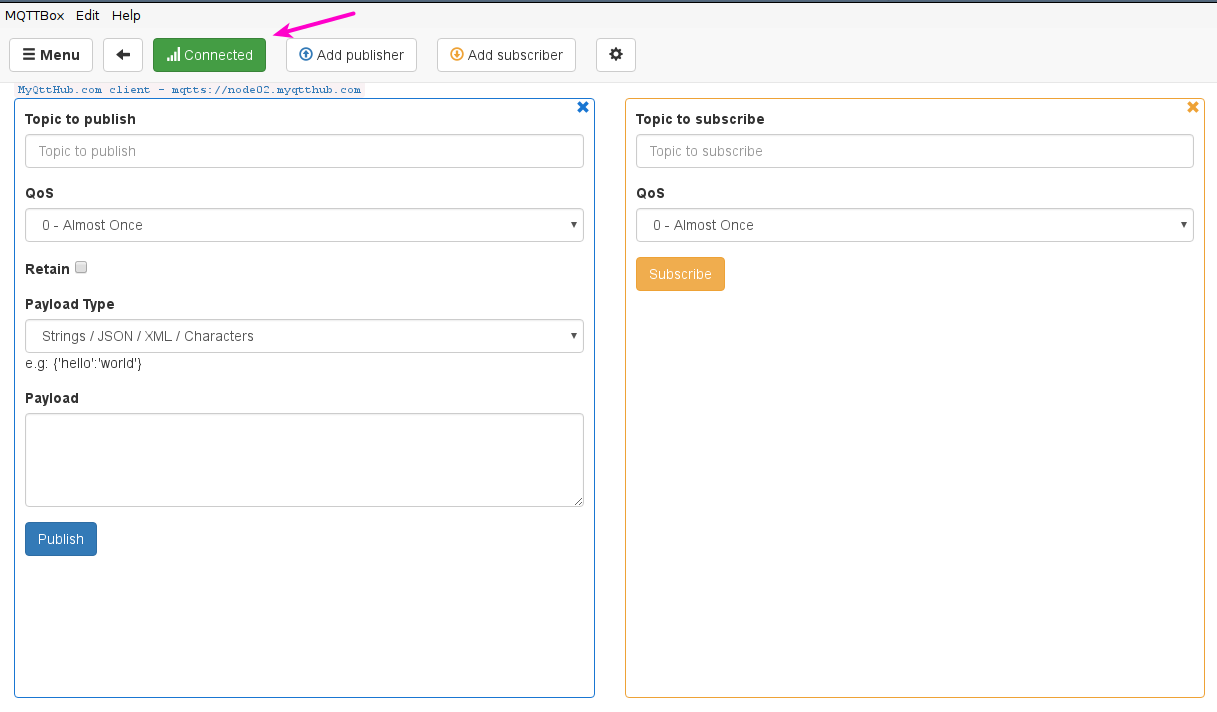
After that, you should get your MQTTBox connected to MyQttHub.com, showing connection ok status like:
4. Additional MQTTBox connection settings
So far we have described basic connection setup. You can configure cleanSession settings, reconnection, ping interval and all available options to setup your connecting account with SCI Auth, skip connection replace, etc.
Please, review MyQtthub.com manual to get more details about this.